Posts

Showing posts from October, 2022

Project 1

Image
  Project 1: Hard Surface Modeling The hard surface model I decided to do is  Knife. Sketchfab:  https://sketchfab.com/3d-models/project-1-hard-surface-modelling-c1b94042fc7f4a33b58b304b9a5839f8 Reference Photo Below shows the process of how I made the model. Modeling Phase In Figure 1, I used a mesh circle and extrude shape to follow the reference model behind it  Figure 1 I then loop cut 5 times in the middle of the handle and bringing the middle edges of each one inwards to give more definition towards the handle Figure 2 I beveled each of the edges to give a more rounded shape and deleted the 3 top vertices on top of the handle to add in the slanted part of the handle and use loop tools add-on to flatten the surface Figure 3 I changed the material to red and filled in the top and bottom of the holes of the handle by simply adding faces by clicking 'F' Figure 4 I deleted the bottom faces of the handle and extruded them to add in the tank  Figure 5 Proceeding ...
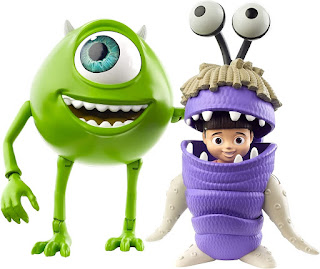
Project 3 (Extra project)

Image
Project 3: Character Modeling (Extra Project) For this project is optional as I had extra time since Mr Kamal extended the due date thus, I tried to make my initial model of my first idea as I enjoyed doing character modelling. The character model I decided to is Boo  from  Monster Inc. Reference photo: Figure 1: Reference Model Modeling Phase 1) Head I started out by adding spheres for the eyes and shaping the head following the reference model with extrusion aswell as the neck. For the ears I also used a sphere object and then to make the ears a bit more realistic I also used the sculpting tool to add definition. I did the same thing for the nose and lips by using the sculpting tool. Putting subdivision surface to also smoothen out the model. Figure 1: Base of the head And then I move the eyes inwards to make the eye sockets later on by giving the base shape of the eyes first. Figure 2: Eye shape  Next, I made the eye sockets by making the vertices around the eye area m...

Exercise 4: Modelling a Karambit

Image
Exercise 4: We are required to do hard surface modelling by doing a Karambit Sketchfablink:  Modeling Phase In figure 1, I extruded the karambit model following the image blueprint Figure 1 In Figure 2, I duplicated the middle section then separate the part and then extrude it Figure 2 Lastly in Figure 3, I increased the crease to make the knife part look sharper and more depth Figure 3 In Figure 4, is the outcome look of the karambit without texturing and color. Figure 4 Texturing & Lighting Phase Applying texture for the handle with black, and the handle with a metallic silver shade. As well putting a spot light directly for it Figure 5 Final Result Below is the final rendered image of the Karambit Figure 6