Project 3
Project 3: Character Modeling
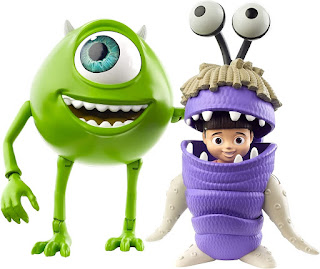
The character model I decided to is Mike Wazowski from Monster Inc.
Sketchfab: https://sketchfab.com/3d-models/project-3-character-modelling-509e662a78274f578fb2eedb587524b9
Reference Photo
1) Front facing model sheet

2) Front-facing, back-view and side facing of model

Below shows the process of how I made the model.
I begin by modelling the basic shape of the head with a sphere and then readjusting the shape by scaling the vertices with loop cut. I used a knife to cut a circular shape in the middle of the head and then removing the faces for the eyeball. I also extruded the mouth inwards to make the shape more hollow.

Figure 1: Modelling the head
Then I added a small detail around the eye socket by extruding the shape outwards and beveled the edges so it looks more rounder. I added multiple loop cuts to redefine the eye bag so the edge looks sharper.

Figure 2: Adding head details
I added faces into the missing hole of the eye socket and then extruding outwards and scaling it proportionally so it gives a round eyeball look. I did small adjustments on the eyeball shape by readjusting the vertices so it looks natural into the eyeball shape.

Figure 3: Adding eyeball shape
Then I decided to cut half of the model and apply the mirror modifier so it is easier for both sides to look symmetrical referencing the character sheet.

Figure 5: Applying mirror
Proceeding to add the rest of the body which is the arms, legs and ears. I basically extruded the vertices following the reference sheet from front view and side view. Using the scaling and grabbing tool to adjust the sizing accordingly.

Figure 5: Applying mirror
Beveling the edges so it looks rounder and then adding subdivision surface to smoothen out the model. The elbow was bend and the shoulder was slightly a different size so I had to put loop cuts in between to readjust the size and using the grab tool to move the arm forward. Resizing the tip of the ear as well so it looks more pointed.

Figure 5: Adjusting arm size
The view from the back was flat so I had to scale the back of the body so it looks more rounder putting loop cuts and then scaling the edge. Checking the shape of the overall body in different angles.

Figure 6: Adjusting body size
This is the final stage of the modelling phase by adding all details of the character and doing minor adjustments of each of the size and position. I only scaled a little and increase the bevel weight accordingly to the most suitable look during this stage.

Figure 7: Adding final touches
UV & Texturing Phase
I unwrap the UV of the eyeball so it was easier for me to apply the texture. I use the texture from the reference picture and apply the material from the reference by following the circular shape of the eyeball to reapply it into my model.

Figure 7: UV unwrapping

Figure 8: Eyeball texture
Adding the skin texture by putting a green colour material to the body. Then adding a black colour materials to the tip of the horns and an off white colour material for the nails.

Figure 9: Skin texture
Checking the rest of the textures applied to the model. I decided to make the teeth white and the tongue of the model darker green colour material to mimic the colour of its body. The inside of the mouth will not be as visible as it the shadows will hide the colour.

Figure 10: Final textures
Final Result (Rendered)
The final output is as shown below with front-facing view, side-facing view and back view of the finished character model with the textures applied.
1) Front facing view

2) Side facing view

3) Back view


Comments
Post a Comment